* 2 pieces of patterned paper or cardstock (12x12)
* 2 pieces cardstock for the tags
* ribbon (10 pieces from around 3 inch, 7,5 cm)
* double sided tape
You can choose from 2 covers.
For the felt cover you need:
* felt
* embroidering thread
* Magnet (Basic Grey)
* transparency
* Tacky glue
For the chipboard letter cover need:
* 2 chipboard letters (2.76-2.76 inch, 7 x7 cm)
* 2 pieces of ribbon (around 9.85 inch each, 25 cm)
* paint to cover the letters of patterned paper
* paperglaze (if you want)
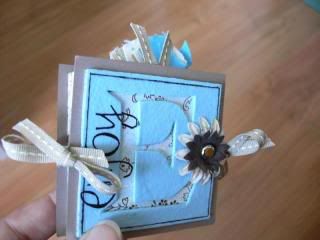
The felt mini album:

The chipboard mini album:
*********************************************************************************
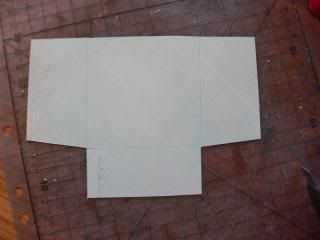
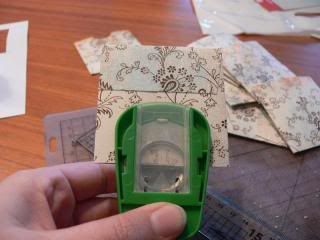
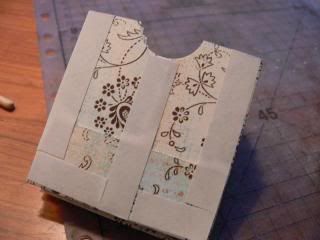
# Cut from patterned paper or cardstock, with the help of the pattern 10 envelops (you can do more or less if you want.
Save the pattern by clicking with your right mouse button on it, choose save as, print the pattern on the right size.

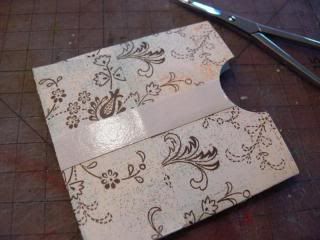
After cutting the envelops, cut away the diagonal lines, for easier folding.

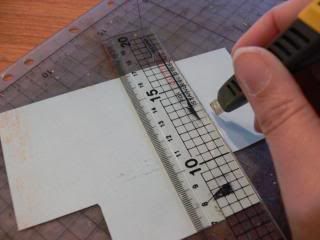
# Trace the foldinglines
# Glue the envelopes together
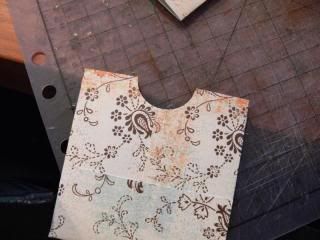
# Diecut from the upside of the envelops a half circle.
(or any form you want)
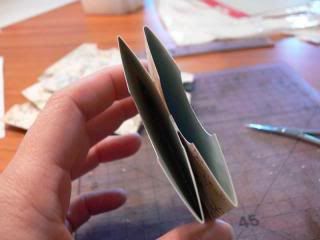
# Put the envelops together with doublesided tape. You only have to use tape in the middle of the envelop.

# Cut 10 square tags (2.56 x 2.56, 6,5 x 6,5 cm). One for each envelop.
# Make a hole in each tag and put a ribbon through it.
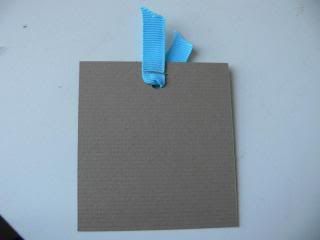
# You can now alter the tags as you want.
Now you can choose from 2 covers, the felt cover or the chipboard letters .
Felt cover:
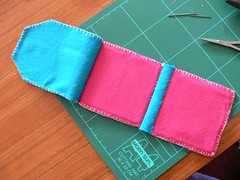
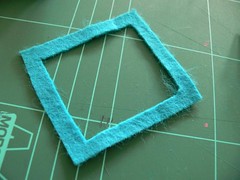
# Cut 6 pieces of felt (3.15 x3.15 inch, 8 x 8 cm).
# Cut 2 pieces of chipboard (2.96 x 2.96 inch, 7,5 x 7,5 cm).

# Put double sided tape on the chipboard and glue it to one piece of felt.
Do that with the other piece of chipboard to.
# Put the other piece of felt on it, so the chipboard will be inside the two pieces of felt.
# Sew the felt together like this:

# Leave one side open!
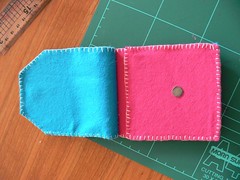
# Cut one piece of felt from 2.96- 0.59 inch, (7,5 x 2,5 cm).
# Sew it between the two squares you’ve already have. Take the side that’s still open!
# Cut two pieces of felt (3.94 x 3.15 inch, 10 x 8 cm) for the turnover. Cut the corners of the downside.
Cut a piece of chipboard (2.76 x 2.76 inch, 7 x 7 cm) cut the corners and put it with double sided tape to one piece of felt.
Put a magnet (Basic Grey) on the chipboard.
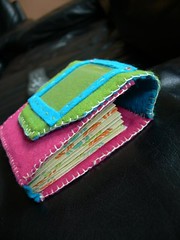
Sew the turnover together and attach it to the upside of the little bag you’ve already had.
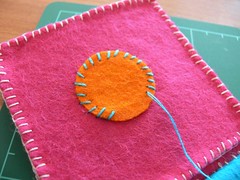
# Put the other side of the magnet on the front side of the little bag.
To do that easy, you’ll put in on top of the other magnet inside the felt, close the turnover and stick the magnet there.
# Cover the magnet with a circle of felt.
# Now we’re gonna make a photoframe on the turnover.
Cut a piece of felt (2.56 x 2.76inch, 6,5 x 7 cm).
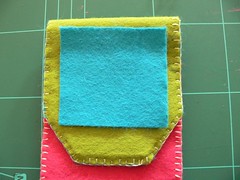
# Cut a piece of transparency as big as the felt frame.
Sew the felt and the transparency together.

# Glue the frame on the bag. I used Tacky glue for it (Leave the upperside open!!).
For extra strong hold, put two eyelets through the frame and the bag!

# Glue the envelops in the bag. I used Tacky glue for this too.
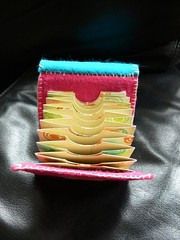
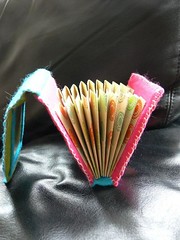
Now you can dress up your felt bag, with felt flowers etc.
With this felt cover you can put the mini tagbook in your bag and have your pictures always with you!
Chipboard letters:
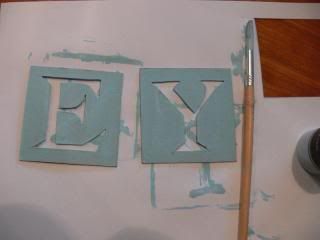
# Cut 2 squares (2.76-2.76 inch, 7 x 7 cm) from chipboard.
Cut two letters you want to use. I choose for the E and Y from Enjoy!
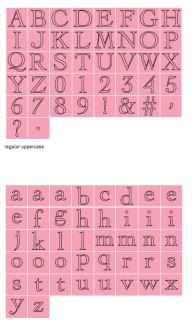
You can use the image below as example for your letters.
# Now you’re gonna alter de letters. You can choose for paint of patterned paper. Paint the letter (you’ll have to do that twice probably) or cover it with PP.
I painted mine and covered it afterwards with Paperglaze.
# Put a different piece of paper behind the letter.
[img][/img]
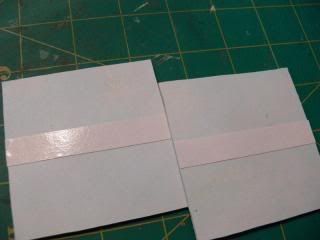
# Cut 2 pieces fo cardstock (2.96x 2.96 inch, 7,5 X 7,5 cm)
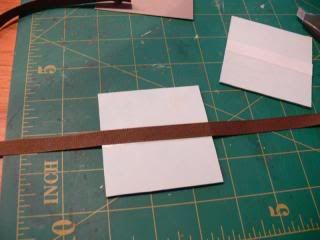
# Put on the backside of your letters a piece of double sided tape. On this you put you pieces of ribbon
(each around9.85 inch, 25 cm)

# Glue your letters on the pieces cardstock you just cut.

# Put the envelops with double sided tape against the letters.
# Alter the letters as you want.

7 opmerkingen:
This is a wonderful tutorial! I love the felt one the best!
tropicalart77 (Tammy)
very very cool!!!
Supergaaf Miranda! :D
You already know that I really like this project. Great tutorial by the way. Have to try this one myself one day. Thanks for sharing!
een prachtig album en vond het een van de mooiste items voor de ScrapStreet contest.
Wow- this is amazing!!! Thank you so miuch for sharing!
SUPER!!!!!
Een reactie posten